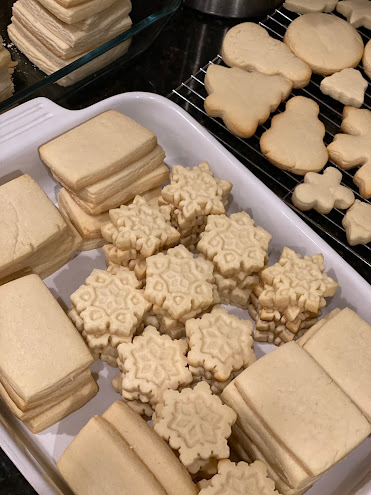
Easy and Delicious Sugar Cookies
This is my absolute go-to cookie recipe of all times. It doesn't spread much, doesn't need chilling, you can make the dough and bake it, melt your butter and it works, quadruple the batch and it works, bake it and freeze it and it works. It is simply the BEST recipe of all times for sugar cookies. It's not too sweet, and super versatile.
I have been a crazy cookie lady since 2010 when I became obsessed. I would STUDY Sugarbelle's and Sweetopia (Marina's) blog. Read their posts, watch the videos, just take all of what they offered into my soul. I want to be them when I grow up. They are STILL rockstars in my eyes (those ladies and Bakerella. The #originals)
Marina recently published a gluten free sugar cookie made with almond meal that looks amazing. Definitely worth a try!
I have definitely come a long way from my cookie decorating abilities. Even my preferences for cookie dough, and techniques. In the end it will always be a canvas for my childlike imagination to create yummy goodies to share with those I love.
My dessert tables are never short of cookies. Here are a few of my cookies. I will even leave you a few pictures to chuckle at from back when I first started. :)
INGREDIENTS
3 cups all purpose flour
1/2 teaspoon salt
1 teaspoon baking powder
1 egg
1 teaspoon vanilla extract
1 cup sugar
1 cup unsalted butter at room temperature
Makes about a dozen medium sized cookies at 1 cm thick (you'll have to try because every cookie cutter and the thickness you chose will make this number vary significantly).
Bake at 350 on a nonstick surface (parchment paper or silicone silpats). Depending on the size of your cookie and thickness, bake for 5 min to 12 min. You'll have to get the hang of your oven and cookies. You want the bottom barely golden to get my favorite texture.
FUNDABBLER FACT:
I announced my last baby's arrival with cookie dough and cookie cutters :) (photo edit cred to the fabulous Tania)
PROCESS:
Cream your butter and sugar together. Add the vanilla and eggs mix well.
In a separate bowl add your flour, salt, baking powder and whisk. Combine the two and make into a homogeneous mix.
Roll out using something to make your cookies even, either stack up paint mixing sticks from your favorite hardware store (1 or 2 depending on the thickness you prefer) then rolling out while resting both sides of your rolling pin on the sticks.
Or, rolling pin spacers are a thing. One of my favorite tools in my kitchen is my Joseph Joseph rolling pin
I always cover my work surface with seran wrap, It just makes it much easier to pick up the cookies without deforming them, (stick your hands underneath) especially when working with kids!
I ball out my dough and roll it out. Feel free to double and quadruple the mix if need be. You can freeze it if you want, just re-kneed it once thawed. You can bake it and then freeze it. Simply place it in an airtight container or ziplock bag either way you chose to freeze.
I have started to prefer fondant over royal icing. It's sleeker, more modern looking, less sweet, I prefer the stretchy chewy texture with the harder, cookie, crumbly, crunch. The royal icing is super hard and less forgiving. Here is a bit of my cookie making history in pictures. No particular order, defiantly not all my cookies. I'm sure you'll spot the evolution ;)
I always get the kids involved. If it's fondant I use white fondant and hand them a food coloring marker, if it's royal icing I let them go at it. Hope these inspire you to get creative. I always separate the kids' cookie making experience from my own work because anyone who has tried cookie making with kids knows:
1. They get tired quick, so I make ONE small batch WITH the kids and that becomes theirs to make and decorate from A to Z. Less patients and long term involvement required on their end. Less wining and grumbling for you!
2. Their self control of licking and touching and licking is not fully under control so their creations are their own indulgences and microbiomes anyway.
3. If I'm setting up for a kids party or friends to decorate, I make sure all the kids have their own bowls and spoons of designated sprinkles, candies, decorations so in the end I put the leftover mix in a bag and if they want to take it home and decorate with family they can, if not, IN THE GARBAGE! No sharing germs on my watch. (I was a germaphobe before it was cool).
4. You may have an expectation for your cookies, aesthetically especially. So instead of discouraging the kids to be creative and not do it MY way, I allow their little creative heads the tabula rasa they need to become the bakers they chose to be. (Yes I'm THAT kind of mom). They don't "ruin" my toes, my frosting, or "waste" the ones I need more. They have their own and they get to do with it what they want!


Comments
Post a Comment